The Arduino has rows of connectors along both sides that are used to connect to electronic devices and plug-in 'shields' that allow the Arduino to do more.
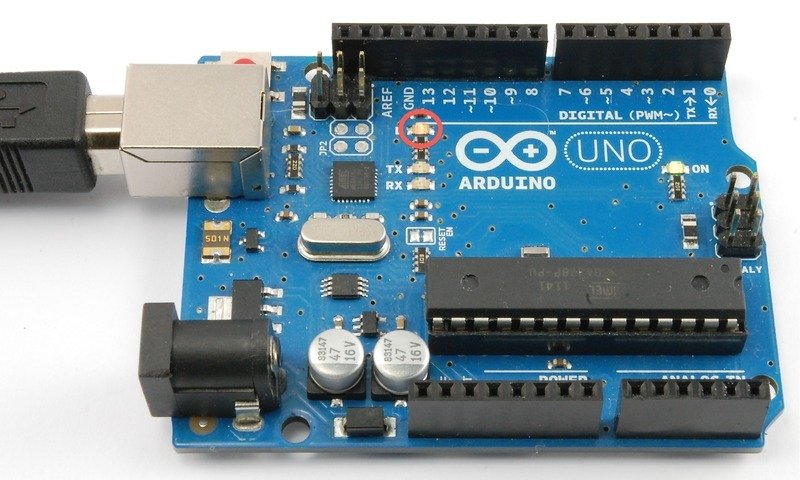
However, the Arduino also has a single LED that you can control from your sketches. This LED is built onto the Arduino board and is often referred to as the 'L' LED as this is how it is labelled on the board.
The position of this LED is circled in red on the pictures of the Arduino Uno and Leonardo below.


You may find that your Arduino board's 'L' LED already blinks when you
connect it to a USB plug. This is because Arduino boards are generally
shipped with the 'Blink' sketch pre-installed.
In this lesson, we will reprogram the Arduino with our own Blink sketch and then change the rate at which it blinks.
In Lesson 0, you setup your Arduino IDE and made sure that you could find the right serial port for it to connect to your Arduino board. The time has now come to put that connection to the test and program your Arduino board.
The Arduino IDE includes a large collection of example sketches that you can load up and use. This includes an example sketch for making the 'L' LED blink.
Load the 'Blink' sketch that you will find in the IDE's menu system under File → Examples → 01.Basics

When the sketch window opens, enlarge it so that you can see the whole of the sketch in the window.

https://learn.adafruit.com/adafruit-arduino-lesson-1-blink/the-l-led
Δεν υπάρχουν σχόλια:
Δημοσίευση σχολίου
Το blog TEO O ΜΑΣΤΟΡΑΣ ουδεμία ευθύνη εκ του νόμου φέρει σχετικά σε άρθρα που αναδημοσιεύονται από διάφορα ιστολόγια. Δημοσιεύονται όλα για την δική σας ενημέρωση.